

How To Get Dr Mario In Melee
This is a guide to using Dr. Mario in Super Smash Bros. Ultimate. Dr. Mario's bread and butter combos, how to unlock, frame data, alt costumes and skins, as well as Dr. Mario's matchups, counters, and tier list placement can all be found here.
| Dr. Mario | |
|---|---|
 | |
| Game Series | Super Mario Bros. |
| Smash Bros. Debut | Super Smash Bros. Melee |
| Fighter Number | 18 |
| Unlock Order | 62 |
| Number of Jumps | 2 |
| Weight | 98 Units (33/87) |
| Dash Speed | 1.464 (78/87) |
| Air Speed | 0.9238784 (76/87) |
| Fast Fall Speed | 2.4 (57/87) |
| Special Attributes | Wall Jump |
Dr. Mario in Smash Ultimate is a character who fights up close using his moves with high damage output and knockback. His quick and easy to hit aerial attacks (Nair, Bair, Uair) are good for dealing damage, while he can make use of his Down Special and very fast Smash Attacks / Up Special to take stocks.
While his Up B is very strong as a finisher, the vertical distance on it is significantly worse than that of regular Mario's, so you have to be extra careful not to get edgeguarded, or else he will have a tough time recovering. His poor mobility also makes it somewhat difficult for him to approach characters with superior range.
See Our Tier List Here!
| Strengths | ・Several powerful moves for taking stocks (Smash Attacks, Up B, F-air, Down B) ・Several moves that come out quick and deal decent damage (N-air, etc) ・Up B is good for breaking combos and edgeguarding |
|---|---|
| Weaknesses | ・Poor mobility (very slow) ・Poor range on his attacks ・Poor recovery (Up B) |
| | |
| -2 | |
|---|---|
| -1 | |
| 0 | |
| +1 | |
| +2 | |
1. -2 = Disadvantage. -1 = Slight Disadvantage or Even. 0 = Even. +1 = Slight Advantage or Even. +2 = Advantage.
2. The matchup chart was based around both the opinions of professional players of each character, as well as our own experience through playing Dr. Mario.
3. Characters within each tier are unordered
4. Pokemon Trainer's individual Pokemon (Squirtle, Ivysaur, and Charizard) as well as Echo fighters with no significant difference than their regular counterpart are not shown.
5. For other characters who are not shown here, we are still investigating the matchup.
| Grounded Combos |
|---|
| Down Throw┳Up Smash ┣Up Tilt ┣Up Special ┣Down Special ┗Up Tilt |
| Dash Attack┳Up Air ┗Down Special (Only when opponent is on the ledge) |
| Aerial Combos |
| Neutral Air━Down Tilt━Up Special |
| Jump━Neutral Special━F-air(Down Special) |
| Down Throw Combos Explanation |
|---|
| This combo can work with a wide variety of percents. The down throw to down special combo can also be used as a killing combo. |
| Dash Attack Combos Explanation |
|---|
| This combo can be landed by starting it just after landing a dash attack. The dash attack to down special combo will only work when the opponent is on the ledge, but it is a kill so be sure to remember it. |
| Neutral Air━Down Tilt━Up Special |
|---|
| This combo can be used on opponents with lower percents. This attack will do around 32% damage, so try to incorporate it into your gameplay. |
| Jump━Neutral Special━F-air(Down Special) |
|---|
| A killer combo that can be used at various percents. You need to learn the timing of how to get next to your opponent the instant after you use your special for this combo to work. By learning this, your kill options will be increased. |
| Move | Frames |
|---|---|
| Up B | 3 Frames |
| Neutral Air | 6 Frames |
| Up Air | 7 Frames |
| Up Smash | 9 Frames |
| Back Air | 9 Frames |
| Shield Grab | 10 Frames |
Dr. Mario has access to some great out of shield options, with his up B being one of the quickest out of shield moves in the game. It will be your go to oos punish, as it is quick enough to punish nearly any move that hits your shield without proper spacing. Dr. Mario can also use one of his aerials for a quick punish, depending on where the opponent is, or an up smash to hit opponents above him. His shield grab is 10 frames, which can lead into a combo starting with down throw.
| 1v1 Damage (%) | Startup Frames | |
|---|---|---|
| Jab 1 (A) | 3.5 | 2 |
| Jab 2 | 2.1 | 2 |
| Jab 3 | 5.6 | 3 |
Dr. Mario's jab is extremely fast, making it a great move to use after landing, or as an up close get-off-me tool.
| 1v1 Damage (%) | Startup Frames | |
|---|---|---|
| Dash Attack (Dash + A) | 13.8 | 6 |
| Dash Attack (Weak Hit) | 8.4 | 10 |
| Forward Tilt (← or → + A) | 9.8 | 5 |
| Up Tilt (↑ + A) | 8.8 | 5 |
| Down Tilt (↓ + A) | 9.8 | 5 |
| Down Tilt (sour spot) | 7 | 5 |
Dr. Mario's dash attack slides forward, and will send an opponent upward so they can be comboed. Its long hitbox makes it good for catching opponents' landings.
Dr. Mario's forward tilt has good range, and very quick startup. It is another good get-off-me tool for opponents that you want to send away.
Dr. Mario's up tilt sends opponents upward, allowing for various combos into itself, up air, or back air. It is one of his main combo starters.
Dr. Mario's down tilt sends opponents upward, and is another quick combo starter. It can combo into down B at higher percents, which is one of Doc's main KO confirms.
| 1v1 Damage (%) | Startup Frames | |
|---|---|---|
| Forward Smash (Smash ← or → + A) | 25.1 | 15 |
| Forward Smash (sour spot) | 20.7 | 15 |
| Up Smash 1 (Smash ↑ + A) | 19.7 | 9 |
| Down Smash 1 (Smash ↓ + A) | 14.1 | 5 |
| Down Smash 2 | 16.9 | 14 |
Dr. Mario's forward smash has different damage and knockback depending on whether it hits from the base or the tip. When possible, try and hit opponents up close with it, since Dr. Mario's hand will send opponents further.
Dr. Mario's up smash comes out quick, has relatively short endlag, and gives him temporary intangibility on his head. It is great for punishing an opponent attempting to approach from the air.
Dr. Mario's down smash is his fastest smash attack, and kicks on both sides of him. The back hit is stronger than the first one, so if using it to KO, try and hit opponents while turned away from them. It can be used to catch rolls or edgeguard recovering opponents.
| 1v1 Damage (%) | Startup Frames | |
|---|---|---|
| Neutral Air (A + no direction while airborne) | 7 | 3 |
| Neutral Air (delayed hit) | 11.2 | 11 |
| Forward Air (Initial Hit) | 14.1 | 16 |
| Forward Air | 21.1 | 17 |
| Forward Air (Weak Hit) | 12.7 | 21 |
| Back Air (← or → Opposite of the direction you are facing + A while airborne) | 16.9 | 6 |
| Back Air (sour spot) | 9.8 | 9 |
| Up Air (↑ + A While Airborne) | 12.2 | 4 |
| Down Air (↓ + A While Airborne) | 16.9 | 16 |
Dr. Mario's neutral air comes out extremely quick and has a lingering hitbox. It is great as a combo breaker and get-off-me tool. It is extremely safe on shield too (-4/-3), so it is good for shield pressure as well, and can also be used for ledgetrapping.
Dr. Mario's forward air deals great damage and knockback. It can be comboed into from a pill (neutral B), which is a useful KO confirm. It does not spike opponents.
Dr. Mario's back air has good range and quick startup, and since it is -5/-6 on shield, it is good for pressuring shields. It is a good KO option for Dr. Mario, so aim it at opponents at high percents.
Dr. Mario's up air comes out very quick, and sends an opponent upward, making it useful as a combo extender.
Dr. Mario's down air is a stomp, which can spike opponents, making it useful for edgeguarding or as an on-stage combo starter.
| 1v1 Damage (%) | Startup Frames | |
|---|---|---|
| Neutral Special (B) | 7 | 17 |
| Neutral Special (weaker hit after 2 bounces) | 7 | 47 |
| Side Special (← or → + B) | 9.8 | 12 |
| Up Special (↑ + B) | 16.9 | |
| Up Special (sour spot) | 8.4 | |
| Down Special (↓ + B) | 2.2 | 10/14/18/22/26/30 |
| Down Special (last hit) | 4.2 | 40 |
Dr. Mario's neutral special sends a pill out, which bounces forward on the ground. Capsules are one of Dr. Mario's main approach tools, as they allow him to find an opening on his opponents, and can combo into other moves.
Dr. Mario's side special is used to reflect projectiles back at the sender. When used directly on an opponent, it will reverse the direction they face, so it is useful for edgeguarding, since it can send an opponent in the opposite direction.
Dr. Mario's up special is a powerful move that comes out extremely quick, making it a great out of shield option. It can be used to KO opponents, but it is rather lacking as a recovery, since it offers poor vertical movement.
Dr. Mario's down special is a powerful spinning attack with great knockback on the final hit, making it useful as a KO option, particularly when preceded by a down throw. Mashing the special button also allows Doc to travel upward slightly, so it can be used together with hs jump and before up special when offstage to recover.
| 1v1 Damage (%) | Startup Frames | |
|---|---|---|
| Pummel | 1.8 | 1 |
| Grab (Normal) | - | 6 |
| Dash Grab | - | 9 |
| Pivot Grab | - | 10 |
| Forward Throw (Hitbox) (← or → While Grabbing) | 11.2 | 13 |
| Back Throw (Hitbox) (← or → While Grabbing) | 15.5 | 30 |
| Up Throw (Hitbox) (↑ While Grabbing) | 9,8 | 18 |
| Down Throw (Hitbox) (↓ While Grabbing) | 7 | 18 |
Dr. Mario's forward throw is mainly used for gaining stage control or putting an opponent offstage. It does not KO until very high percents, so it is usually better to go with another throw.
Dr. Mario's back throw is one of the strongest of its kind on the game. When standing near the ledge, it is great for KOing an opponent at 100%+.
At low percents, Dr. Mario's up throw can combo into his aerials like back air or up air.
Down Throw is Dr. Mario's go-to throw, since it can combo into a variety of his moves. Near the ledge, it can be comboed into down b for one of his most powerful KO confirms.
| Attack Name | How to Use | Effect |
|---|---|---|
| Doctor Finale | Press B after obtaining the Smash Ball | Releases two massive capsules. Deals multi-hits to opponents and heavy knockback. Jumping before using it will allow the capsules to cover more area. |
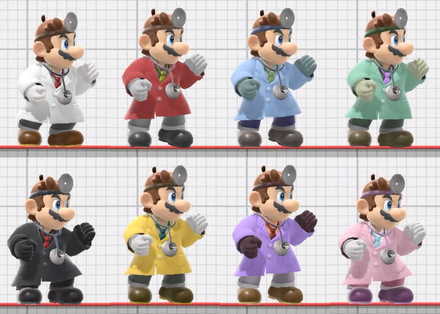
| Change | |
|---|---|
| Neutral Air Attack | Extended launch distance for the high-damage window. |
| Up Air Attack | Increased attack power and maintained launch distance. |
| Down Air Attack | Increased attack speed. |
| Side Special | Increased the amount of time hit detection lasts. |
| Down Special | Increased the speed that super armor activates when using the move on the ground. |
| Change | |
|---|---|
| Final Smash | Increased power. |
| Change | |
|---|---|
| Side Tilt Attack | Increased power. Extended launch distance. |
| Down Tilt Attack | Increased the amount of time opponents will be in the damage animation. Shortened launch distance. |
| Neutral Air Attack | Increased the power of the attack in the high-damage range. Extended launch distance when hit in the high-damage range. |
| Down Air Attack | Increased the amount of time hit detection lasts. |
| Up Special | Extended launch distance when hit in the high-damage range. |
| Change | |
|---|---|
| Final Smash and FS Meter | At the start of the move, nearby opponents will be slowed more and slowed longer. |
| Neutral Special | Reduced the power against shields. |
| Change | |
|---|---|
| Down Aerial (↓+ A While Midair) | Meteor hitbox added in. Buff. |
| Unlocking Via Smash Mode |
|---|
| 62nd fighter unlocked After unlocking Bower Jr. let 10 minutes pass OR play another battle in smash after soft-resetting OR return to the menu from World of Light |
| Unlocking via Classic Mode |
| Clear Classic Mode 7 times with Mario. |
| Unlocking via World of Light |
| Ribbon Road |
There are 3 ways to unlock Dr. Mario. Completing any of these, then defeating Dr. Mario when they appear in the "a New Challenger Appears" screen will allow you to use them afterward.
How to Unlock Characters Fast
 Enlarge
| Character Stats | |
|---|---|
| Weights of All Characters | Run Speeds of All Characters |
| Air Speeds of All Characters | Fast Fall Speeds of All Characters |
How To Get Dr Mario In Melee
Source: https://game8.co/games/SSBU/archives/281191
Posted by: stonemanoundiciat.blogspot.com
0 Response to "How To Get Dr Mario In Melee"
Post a Comment